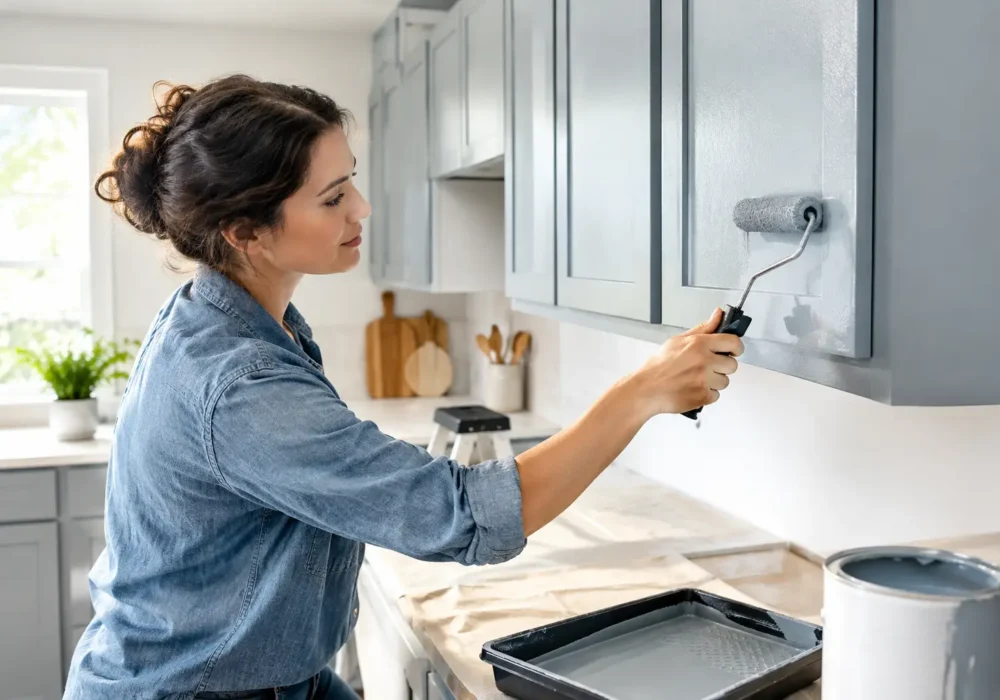
A tired kitchen can look completely different once dark timber, dated cream or worn laminate cabinets are given a fresh, well-prepared finish. Knowing how to paint kitchen cabinets is less about getting colour on the doors and more about preparing every surface so the coating can cope with fingerprints, cooking moisture, cleaning and daily use.
Cabinet painting is a worthwhile project when the doors and carcasses are sound, the layout still works and you want an updated look without the cost and disruption of replacing the kitchen. It does demand patience, however. Rushing the cleaning, sanding or drying stages is the usual reason paint chips around handles, peels from laminate, or feels rough after only a few months.
Before You Paint Kitchen Cabinets, Check the Surface
Start by working out what the cabinets are made from. Solid timber, painted timber and MDF doors are generally good candidates for repainting. Laminate and melamine can also be painted successfully, but they need particularly thorough degreasing, scuff sanding and a primer designed to bond to slick surfaces.
Look closely at the condition of the doors, drawer fronts and panels. Loose hinges, swollen MDF edges, peeling vinyl wrap, deep scratches and water-damaged sections should be repaired before painting. Paint improves a surface, but it will not stabilise damaged board or hide failed cabinetry. Peeling vinyl is often a sign that replacement fronts will be the better long-term choice.
If the kitchen was painted many decades ago, take extra care when sanding old coatings. Older paint may contain lead. Avoid dry sanding until the coating has been assessed, and seek qualified advice where there is any doubt.
A cabinet finish also needs a realistic colour choice. White and pale colours brighten smaller kitchens but show scuffs more readily near handles and bins. Deep navy, charcoal and green can look smart and forgiving, though every dent or uneven brush mark is more noticeable in strong light. Test your chosen colour on a sample board and view it morning, afternoon and under the kitchen lights.
How to Paint Kitchen Cabinets Step by Step
The best result comes from treating preparation and painting as separate jobs. Allow several days rather than expecting a single weekend turnaround, especially if you have a working household to organise around.
Remove doors, drawers and hardware
Take off doors, drawer fronts where practical, handles, knobs, catches and hinges. Number each door and its matching cabinet opening with low-tack tape, and place screws and fittings in labelled bags. This saves a surprising amount of time when it is time to reassemble the kitchen.
Painting doors flat on trestles or a protected workbench makes it easier to coat edges evenly and reduces runs. Cover benches, appliances and floors carefully, and mask areas that cannot be removed. Good dust control matters just as much as drop sheets, because airborne sanding dust can settle into wet paint.
Clean away grease and contaminants
Kitchen cabinets collect an invisible film of cooking grease, hand oils, polish and cleaning residues. A quick wipe with a damp cloth is not enough. Wash every face, edge, groove and handle area with a suitable degreaser or sugar soap solution, following the product directions. Rinse if required, then allow the surfaces to dry fully.
Pay close attention to cabinets around the cooktop, rangehood, rubbish bin and pantry. If sanding produces a gummy residue on the abrasive, there is still grease on the surface. Clean again before moving on.
Repair, fill and sand
Fill small dents, redundant handle holes and open joints with a quality filler suited to the cabinet material. Sand the repairs flush once dry. Any damaged MDF edges should be sealed and built back carefully, as raw edges absorb moisture and paint very quickly.
Then sand the entire surface lightly to create a sound key for the primer. The aim is not to strip every cabinet back to bare timber. It is to remove gloss and level minor imperfections without cutting through veneers or damaging profiles. Use a sanding block for flat areas and a finer abrasive by hand around mouldings.
Vacuum thoroughly, including the grooves and inside edges, then wipe down with a clean lint-free cloth. Even a small amount of remaining dust can leave a gritty finish.
Prime for the material, not just the colour
Primer is the layer that determines whether a cabinet coating adheres well. Bare timber, MDF, laminate, melamine and previously painted doors may each need a different primer system. A high-adhesion primer is particularly important on laminate and melamine, while stain-blocking primer may be needed over tannin-rich timber or old water marks.
Apply a thin, even coat to the fronts, backs and all edges of the doors, as well as the visible cabinet frames. Resist the temptation to lay it on heavily. Thick primer can pool in routed details and cause drips along the lower edges.
Once the primer has dried for the manufacturer’s stated time, sand it lightly with a fine abrasive. This removes raised grain and nibs, giving the topcoats a smoother base. Vacuum and wipe down again.
Apply a durable cabinet coating
For most kitchen cabinets, choose a hard-wearing water-based enamel or another coating specifically recommended for cabinetry and trim. Standard wall paint is not designed for the knocks, wiping and handling cabinet doors receive.
A small quality microfibre roller gives a smooth finish across broad flat panels. Use a good synthetic brush to cut into profiles, corners and detailed edges, then gently roll the adjacent area to blend the finish. Spraying can produce an excellent factory-like result, but it requires proper masking, ventilation, equipment and experience. It is not automatically the best option in an occupied home.
Apply two thin topcoats, allowing the full recommended drying time between coats. Lightly sand between coats if the product instructions call for it, or if you can feel dust nibs. Do not judge coverage while the paint is wet, as many water-based finishes look uneven until they have dried.
Let the coating cure before normal use
Dry and cured are not the same thing. Doors may feel dry within hours, but the coating can take days or longer to reach its full hardness. Refit hardware carefully after the paint has set enough to handle, but avoid slamming doors, scrubbing the surface or hanging heavy tea towels from handles during the cure period.
This stage is often overlooked. Giving the paint time to harden protects the finish when the kitchen returns to normal use.
Common Cabinet Painting Problems and How to Avoid Them
Brush marks usually come from overworking paint as it starts to dry, using a poor-quality brush, or applying too little product. Work in manageable sections, maintain a wet edge and leave the coating alone once it begins to tack off.
Peeling paint is nearly always a preparation issue. Grease, glossy surfaces, missing primer or insufficient sanding can all prevent adhesion. If the coating lifts easily with painter’s tape after adequate drying time, stop and address the cause rather than adding more coats.
Runs happen when paint is applied too heavily, especially on door edges and recessed panels. Check each door from different angles shortly after coating it, then brush out or roll out drips while the paint is still wet. Painting flat where possible makes this much easier.
Dust in the finish can be reduced with a clean work area, careful vacuuming and closed windows where practical. Some dust is unavoidable on a DIY project, but a light sand before the final coat can make a noticeable difference.
When It Makes Sense to Bring in a Professional
Painting kitchen cabinets is achievable for a careful DIYer, but it can be time-consuming when the kitchen has detailed doors, extensive repairs, high-gloss laminate, damaged timber or a tight deadline. The work also needs a sensible plan so the home remains usable while doors are off and paint is curing.
A professional painter can assess the substrate, repair minor damage, select compatible primers and coatings, and manage the preparation that makes the finish last. For homeowners across Wyndham, Hobsons Bay, Greater Geelong, the Bellarine Peninsula and Surf Coast, Seaview Painting Services can provide practical advice and a no-obligation quote for cabinet and interior painting work.
A freshly painted kitchen should feel like a proper improvement, not a surface that needs protecting from everyday life. Give preparation the time it deserves, choose products that suit the cabinet material, and let each coat cure properly. That care is what keeps the new finish looking clean and dependable long after the brushes have been washed.