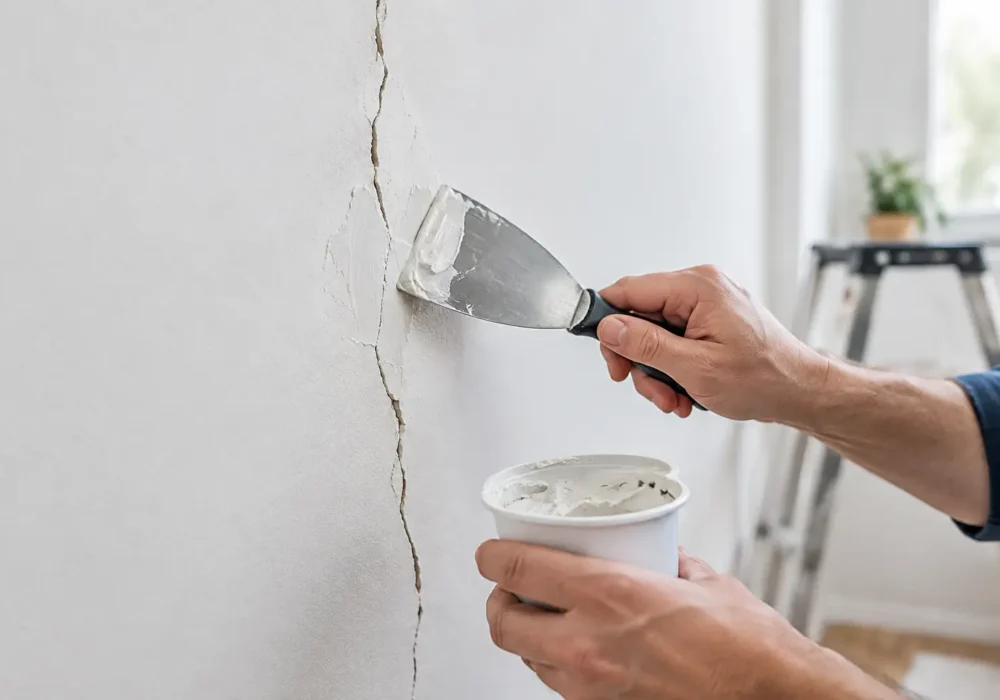
A fresh coat of paint can make a room feel new, but it will not hide a moving or poorly repaired crack for long. Knowing how to patch plaster cracks properly means looking beyond the line in the wall, preparing the area carefully and using the right materials before the painting begins.
Fine cracks are common in homes across Wyndham, Hobsons Bay and Geelong, particularly where seasons, minor settlement and everyday movement affect older plaster. Many are straightforward cosmetic repairs. Others point to moisture, loose plaster or movement that needs attention first. The difference matters, because paint is only as good as the surface underneath it.
Check why the plaster has cracked first
Before reaching for filler, inspect the crack closely. A thin, hairline crack that has been unchanged for years is often caused by normal movement or shrinking around joints. It can usually be repaired as part of standard interior preparation.
A wider crack, a crack that keeps returning, or one accompanied by a bulging wall, staining or soft plaster deserves more investigation. Water leaks from roofing, plumbing or external walls must be fixed before any repair work. Filling damp plaster simply traps the problem and can lead to peeling paint, mould or further damage.
Pay particular attention to cracks around doors and windows, where movement can be more noticeable. Diagonal cracks, rapidly widening gaps, sticking doors or windows, and cracks running through bricks as well as internal plaster may require advice from a qualified builder or structural professional. A painter can repair minor surface cracking, but it is sensible to address the cause before restoring the finish.
For heritage homes, decorative plasterwork or very old lath-and-plaster walls, take a slower approach. These surfaces can be fragile, and a repair that is too aggressive can damage surrounding detail.
What you need for a sound repair
For most small to medium plaster cracks, a basic set of quality preparation tools will do the job:
- A paint scraper or utility knife
- A stiff brush and clean cloth
- Setting-type patching compound or quality interior filler
- Paper or fibreglass joint tape for longer or wider cracks
- A broad filling knife and fine sanding block
- Primer and matching interior paint
Choose a product suited to the repair. Lightweight filler is convenient for tiny nail holes and hairline cracks, but a setting compound generally gives a firmer repair for an opened crack or shallow damaged area. Avoid applying any filler too thickly in one pass. It may shrink, crack or take much longer to dry.
Wear eye protection while scraping and sanding. If the property is older and you are unsure of previous coatings or materials, avoid creating unnecessary dust and seek appropriate advice before sanding extensively.
How to patch plaster cracks step by step
Open and clean the crack
It can feel counterproductive, but a hairline crack needs to be opened slightly before filling. Use the corner of a scraper or utility knife to create a shallow V-shaped groove along the crack. This removes weak edges and gives the compound something solid to grip.
Do not gouge deeply into the wall. The goal is to create a clean, stable channel, not turn a minor repair into a major patch. Brush away all loose plaster and dust, then wipe the area with a clean, dry cloth. Filler applied over powdery material is likely to fail.
If the plaster is loose or hollow when tapped, remove only the unsound material until you reach a firm edge. Larger hollow sections may need more than a simple crack repair and are often best assessed by an experienced tradesperson.
Reinforce longer cracks with tape
For a very fine, stable crack, filler alone may be enough. For a crack that is longer, wider than a hairline or located along a plasterboard joint, apply joint tape after the first thin coat of compound. This reinforcement helps bridge slight movement and reduces the chance of the line showing through again.
Paper tape is commonly used for neat internal joints, while self-adhesive fibreglass tape can be practical for straightforward patching. The key is to bed the tape flat, with enough compound underneath to bond it but not so much that it creates a heavy ridge.
Run the filling knife firmly over the tape to remove air bubbles and excess material. If an edge lifts now, it will be visible later under paint.
Apply thin, wide coats of compound
Use a broad filling knife to press compound into the crack, then feather it out beyond both sides of the repair. A repair should become gradually thinner at the edges, rather than ending in a hard raised line. This wider feathering is what makes the wall look flat when light falls across it.
Allow the first coat to dry fully according to the product instructions. Drying time changes with the product, room temperature, humidity and thickness of the application. Rushing this stage is one of the most common reasons patched cracks sink or show after painting.
Apply a second thin coat, extending it a little wider than the first. On a wall with strong side lighting, such as near a window or hallway downlight, a third skim coat may be needed. It is better to build a repair in light coats than try to sand back a thick mound of filler.
Sand carefully and inspect in good light
Once completely dry, sand the patch lightly with fine-grit sandpaper until it blends into the surrounding wall. Use a sanding block rather than your fingertips, which can create dips. Keep the sanding controlled and avoid scuffing a large area of sound paint.
Remove dust thoroughly with a vacuum and a lightly damp cloth if appropriate for the surface. Then inspect the wall from several angles. Hold a work light or torch close to the surface and shine it along the repair. This reveals ridges, hollows and edges that normal room lighting can hide.
If the repair is not invisible at this stage, apply another thin skim coat. Paint tends to highlight surface imperfections, especially in low-sheen or semi-gloss finishes and rooms with strong natural light.
Prime before painting repaired plaster
New compound is more porous than the surrounding painted wall. If it is painted without priming, it can absorb paint differently and leave a dull, patchy area known as flashing. A quality primer or sealer creates an even base and improves adhesion for the topcoat.
Spot-prime only the repaired area if the existing paint is sound and the wall is otherwise in good condition. For a room with widespread patching, stains, uneven sheen or old chalky paint, priming the entire wall often delivers the more consistent result.
Once the primer is dry, apply two even coats of the chosen wall paint. Keep a wet edge and use the same roller nap across the full wall where possible. Rolling just over a small patch can leave a visible texture difference, even when the colour match is correct.
When a plaster crack needs professional attention
DIY repair is well suited to small, stable cracks in an otherwise sound wall. It is less suitable where cracks keep reopening, water damage is present, plaster is detached, or the repair covers a large area. High ceilings, stairwells and ornate plaster details also carry more risk and benefit from experienced preparation.
For rental properties, commercial spaces, schools and busy family homes, the practical consideration is often downtime. A professional can assess the surface, complete minor repairs cleanly, prime correctly and coordinate the painting so the work is completed with less disruption.
Seaview Painting Services approaches crack repairs as part of the wider preparation process, not a quick cover-up before paint. Careful filling, sanding, sealing and painting help create the smooth, durable finish that a well-kept home or property deserves.
A crack repaired properly should disappear into the wall, not reappear as soon as the light changes. Take the time to find the cause, keep each coat thin and let every stage dry fully. If the damage looks more than cosmetic, getting it checked early is usually the simplest way to protect both the wall and the finished paintwork.