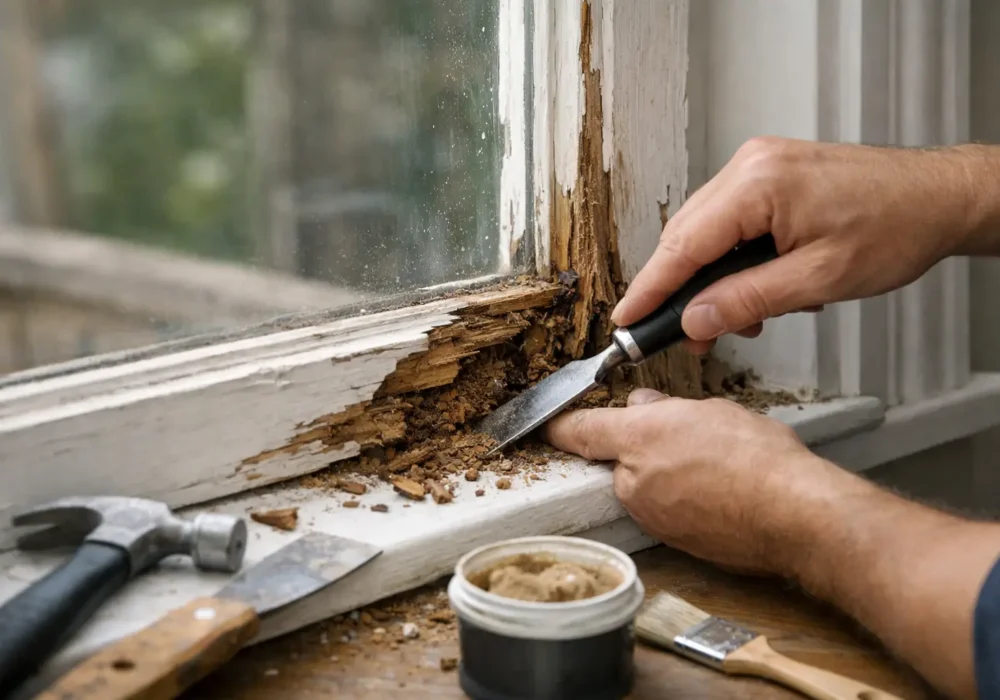
Rot around a timber window frame rarely starts as a major problem. It often begins where paint has cracked, a seal has opened up or water has sat against the sill after rain. Knowing how to repair rotten timber window frames helps protect the surrounding cladding, keeps moisture out of the home and gives a new paint finish something solid to hold onto.
The key is not to paint over soft timber and hope for the best. A lasting repair comes down to finding the full extent of the damage, removing all decayed material and rebuilding the surface properly before priming and painting.
Start by working out how far the rot has spread
Look closely at the lower corners of the frame, the sill, glazing bars, exterior trims and the joint where the frame meets weatherboards or brickwork. These areas carry the most water and are usually the first places timber breaks down.
Press a flat screwdriver or awl gently into suspect timber. Sound timber feels firm and resists the tool. Rotten timber may feel soft, fibrous or spongy, and the screwdriver can sink in with very little pressure. Bubbling paint, dark staining, open joints and timber that looks swollen are also warning signs.
Do not judge the damage by the paint surface alone. Paint can look reasonably intact while moisture has travelled behind it. Check inside the window reveal as well, particularly if there are water marks, mould or a musty smell. The source of the water needs attention before any repair begins.
Decide whether a repair is suitable
Small, localised patches of decay can often be repaired effectively. This is common on sill ends, lower frame sections and narrow external trims, provided the main frame is still structurally sound and the window continues to open, close and lock correctly.
A repair is less suitable where rot extends deeply through a load-bearing section, the bottom rail of the sash is badly compromised, or the frame has moved out of square. If the glass is loose, the window no longer operates properly, or decay reaches wall framing, it may need more substantial carpentry work or replacement rather than filling.
There is a practical trade-off here. A well-prepared minor repair is usually more cost-effective than replacing an entire frame. But repeatedly patching timber that is wet from a leaking flashing, failed seal or drainage problem only delays a larger repair. Fix the cause, not just the visible symptom.
Prepare the work area safely
Before sanding or scraping, protect the glass, nearby cladding and garden beds with drop sheets. Remove loose paint with a scraper and use a paint stripper or heat gun with care where required. Avoid overheating glass or scorching old timber.
Older homes can have lead-based paint beneath newer coatings. If the paint’s age or history is unknown, take sensible precautions: minimise dust, wear appropriate personal protective equipment, avoid dry sanding large areas and keep children and pets away from the work zone. Collect paint debris rather than washing it into garden beds or stormwater drains.
If you are repairing a sash or a large section of frame, it can be easier to remove hardware and work methodically. Mark hinge positions and keep screws and fittings together so reassembly is straightforward.
How to repair rotten timber window frames step by step
1. Remove every trace of decayed timber
Scrape, chisel or rout out soft and crumbly timber until you reach clean, firm material. This step takes patience, but it determines whether the repair will last. Leaving even a small amount of decay behind can allow the rot to continue beneath the filler.
Shape the edges of the cavity so they are clean and stable. For deeper repairs, square edges can make it easier to fit a new piece of timber. Vacuum out dust and loose fibres, then allow the area to dry fully. Timber that is still damp should not be sealed in with filler or paint.
2. Treat and consolidate the remaining timber
Apply a suitable timber preservative or wood hardener to the exposed sound timber, following the product instructions. These products help strengthen porous fibres around the repair area, but they are not a substitute for removing rot. They work best when the damaged section has already been cleaned back to firm timber.
Pay close attention to exposed end grain. End grain absorbs moisture more readily than the face of a board, so it needs thorough sealing before it is covered.
3. Rebuild small cavities with exterior-grade epoxy filler
For shallow or moderate cavities, use a high-quality two-part exterior timber epoxy filler. Mix only what you can apply within the product’s working time, press it firmly into the cavity and slightly overfill it. Once cured, it can be shaped back with a rasp and sandpaper.
Epoxy filler is generally more durable than lightweight interior fillers because it is designed to cope with movement and weather exposure. Even so, it should not be used to recreate large missing sections of frame where a timber splice would be stronger and more reliable.
4. Splice in new timber for larger sections
Where rot has taken out a sill end, frame edge or trim section, cut back to sound timber and install a matching replacement piece. Choose durable, stable timber suited to exterior use and match the existing profile as closely as possible.
The new section should be securely fixed, glued with an exterior adhesive where appropriate, and shaped so water sheds away from the window. Keep joins tight and avoid flat ledges where rain can sit. Once the splice is fixed and cured, fill minor imperfections and sand the repair flush.
This is often the point where professional help is worthwhile. Window frames need to remain square, weather-tight and compatible with the existing sash, glazing and trims. A neat repair that interferes with window operation is not a successful repair.
Seal the details that let water in
The repaired timber is only as protected as the surrounding joints. Check the gap between the frame and cladding, the sill-to-frame junction, glazing putty or beads, and any external trim joins. Remove failed sealant before applying a compatible exterior gap sealant.
Do not seal drainage paths or weep holes. Some window systems are designed to let incidental water escape, and blocking those openings can create a new moisture problem. Likewise, caulking cannot replace failed flashing or correct a sill that slopes back towards the house.
Look above the window too. A leaking gutter, damaged eave, cracked render or failed flashing may be directing water onto the frame. If the same area has rotted more than once, there is usually a water-management issue that needs to be addressed.
Prime and paint for long-term protection
Sand the repaired area and feather the surrounding paint edges until the transition is smooth. Remove all sanding dust before applying a quality exterior primer suited to bare timber, epoxy repairs and the existing coating system. Primer is not a step to rush – it seals the timber and gives the topcoats a consistent base.
Once the primer is dry, apply two finish coats of a durable exterior paint. Work paint carefully into joints, exposed edges and end grain rather than simply brushing across the face of the frame. These are the areas where moisture commonly finds a way back in.
Choose a dry weather window and allow adequate drying time between coats. Painting in direct harsh sun, on very cold surfaces or when rain is expected can affect adhesion and finish. Dark colours can also place more heat stress on exposed timber, particularly on north- and west-facing elevations, so consider the condition and location of the frame when selecting colours.
Keep repaired frames in good condition
A quick inspection each year can prevent a small paint failure becoming a carpentry repair. Wash exterior frames to remove dirt and salt residue, clear leaves from sills and check for cracked paint, open seals and water staining. On coastal properties, regular washing is particularly worthwhile because salt and wind-driven rain can shorten the life of exterior coatings.
If you can see bare timber, address it promptly. A small sand, prime and paint touch-up is far simpler than removing decayed material and rebuilding the frame later.
For homeowners and property managers across Wyndham, Hobsons Bay, Greater Geelong, the Bellarine Peninsula and Surf Coast, Seaview Painting Services can assess minor timber damage as part of thorough exterior preparation and painting work. A careful repair, completed before the repaint, helps the finished window frame look clean and stay protected for longer.
The best time to deal with timber rot is when it is still a small soft spot, not when rain has already found its way into the wall. A little attention to preparation now can preserve the character, function and weather protection of your timber windows for years to come.